Showing posts with label zbrush. Show all posts

Thursday, November 3, 2016

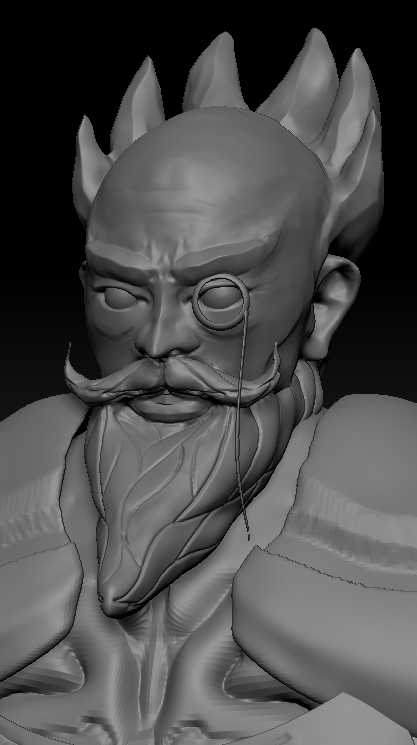
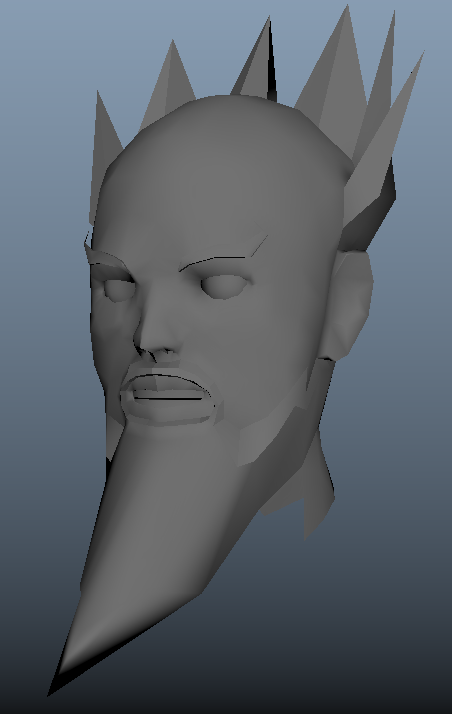
Zbrushing from low poly model part 2


Well last week I was at a convention selling my art so I had no time to work on the model. This week so far I've been investing basically all my time on this dude, zbrushing the low poly into high poly pieces. I'll probably get a good amount done tomorrow.

Also since this piece isnt due until before christmas break so I can work on it alot! polish polish polish.

Wednesday, October 26, 2016

Zbrushing from low poly model.


Its been a while since I used zbrush to work on a model (tileable texture was a good warmup). I have a problem from working from a base mesh from maya and trying to work from there. After a few hours in I remember how fun it is to sculpt on the computer, Dynamesh FTW.
Now I'm just going all out on the detail and such, I'm trying to get a more stylized feel to the character. The hair I feel like I have the grasp, but the face I'll need some more work on.
Its gonna be fun retopo'ng this model..orz

Unfortunately I wont have time until next week to work on this some more since i'll be busy at a convention this weekend.

on another news, I was able to add the base coloring for the warrior character.


Saturday, October 15, 2016

UV Unwrapped models

With the game project with my classmates, I havent had too much time to work on the character models as much as I like, also with the second assessment I've been working on another character (which will get used in the game hopefully) which is the wizard.

I was able to get the unwrapping of the UV's done over the week at school for both character models. So now its time to figure out what to do next..should i try and zbrush some details onto it or should i just go straight into hand painting the model...

anyhow heres the result of the uv unwrapping, I still need to learn how to unwrap and map out the textures nicely.


Friday, September 30, 2016

Double update


I was planning on putting up my blog yesterday of the model I was working on last night, but it when I figured I'd finish for the day it was already 1pm, so I decided to do a double update today of the current state of the model and what I did at school today.


I think its coming along pretty weeeel, so far its about 5k tri's so not bad for a low poly model. And I'm pretty much done just a few fixes here and there to match the design. I really wish I could get 3D coat to paint this character,
One thing I worked hard on was getting a good topology, I'm still a little unfamiliar with getting nice looking topology's so I took some time to work on this. How does it look?

Hopefully I can finish up the model soon and start unwrapping UV's so then I can start coloring this in!! Oh but theres a technique I want to try out, Ambient Occlusion baking into the texture. I heard that gives nice shadows to the model when adding colors.


How do these controllers look like!? does it look real? Take a closer look!
I spent a good amount of time stylizing/vectorizing this xbox one controller for the control screen for the game I am working on with a few of my classmates. (https://grunkamunka.com/)

I really like how these turned out, it was all done in photoshop, no tablet was used, all done with a mouse.
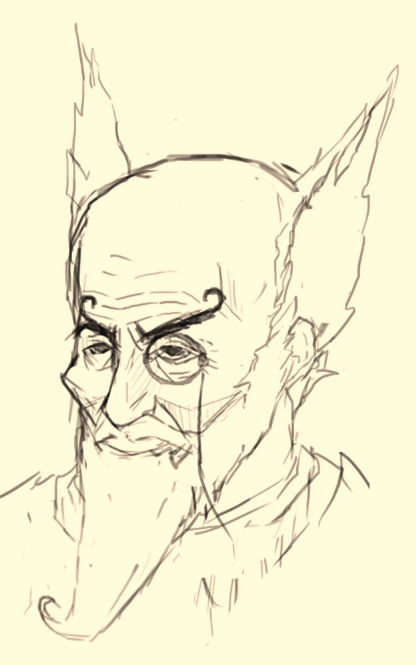
I spent a good amount of time working on our game today at school and did a little bit of sketching out for the next assessment which is character modeling. The model I am planning to make is a wizard character from one of the factions in the game.  

Heres a sneak peak of the profile of the character I thought of. The actual design will most likely change, but I'd like to keep the monocle and curly eyebrows.

Friday, September 23, 2016

environment 02

I'm really starting to enjoy making these tile-able texture maps from zbrush and transferring them to Photoshop to make the maps. Today I wanted to give it a more stylized feel to the rocks and I actually really like how they turned out, although I could have gone and lowered the specs a little because it kind of looks like metal rocks (but that could also be because the physical sun's light was too bright on the rocks)

I forgot the high poly model at school so I don't have a screen shot of it, (will get next week orz) but here is the final result texture map on Photoshop.

the left side could of used more polishing...i didn't notice until I baked the texture 
the first few rocks that had the textures applied
added simple ground/grass/tree models/textures to give it a better feel.


This one looks nice with the physical sun set to sunset. 

We are basically done with our environment level for school, so I think I'll have something to show next week when our assessment begins.

Thursday, September 22, 2016

ohhh little crabs

Today in class I made random assets that will or will not be used in our final product for the environment, so I decided that I will just make a small set for my self.
what I created are ...
shrubbbbbb
logggggggg

crabbbbbb


I didnt want to forget how to do the tileable texture from the rock tutorial, so I created a new tileable texture for the log using the same method.


Mental Ray render
aaaannddd....

it moveeees CRAAAAB!!! *They are not rigged* (sorry for crap quality, it takes forever to render the scene out)


Thats it for today. 


Friday, September 16, 2016

Seamless texture making in zbrush part 2

Another day went by so quickly just working on this tile able texture today! The outcome turned out pretty neat so I think it was a good day, learned a lot again!

Thanks to the teacher for installing xnormal onto the school computer so I can continue to find out what I find helpful when working on my piece.

Going along the tutorial I posted yesterday, I started the second part which was creating the texture map for the model in Photoshop. Xnormal was actually pretty simple to use which was super helpful for me! It seems like its a kind of outdated program since now there are more powerful programs like Substance designer/painter, but I actually liked using Xnormal. I probably should try and learn Substance as well...eventually.


I've used photoshop for many years now, but I havent done something like this before and it was  really fun to do! Just setting up layers of texture map that was created with the Xnormal could come out so fantastic!
The above image was the end result that I ended up using for my textures. 


I personally found this texture very appealing! This is what you would see in like World of Warcraft or League of legend. Its kind of got the cellshade look and it feels good to my eyes.

Here are more screenshots of the model with the texture I rendered in Maya + MentalRay

 <--- this one was imported onto Unity.

Today was another productive day, now I have a to go back to my day job until next week until school... i dont think I'll be able to do much 3D, but hopefully get in some concept sketches of side projects and such.

Also if you havent checked it, on my side bar I have links to my other art pages and there I usually post my "finished" pieces.

Thursday, September 15, 2016

Seamless texture making in zbrush

For our first school project we are making an environment that we will put into Unity so it'll become a playable level (eventually with characters and such)

We are making a cove with a shipwrecked pirate ship.

But so far 2 out of our 4 member has been absent (one sick and other is MIA) and this is due in 2 weeks or less. Team member A and myself have literally been the only ones working on it so far and I'm in charge of the rock assets, in our case Cove rocks. At this rate I'll most likely be working on some of the other misc assets like foliage's (thank goodness I know how to make those pretty well at this point).

Today in class I've been doing a bunch of research on how to make tile-able textures from scratch in zbrush.

I found a really great tutorial ---> Here


If I can learn from this tutorial I could potentially make environments (rocks) assets that look like they are from games made by Naughty dog or Blizzard.

I went ahead and followed the tutorial and started sculpting out rock formations to create the texture maps. It was looking pretty good, but then a friend came over (who was also following the same tutorial) and told me that I missed a step and I'd need to start over. GASP!


What I did wrong was not creating the right plane to start with before moving to zbrush and sculpting. The tutorial I was following did not mention about this step and was bugging my friend so he came over and asked me but I guess I kinda of just went on without noticing (whoops)...
so we did a little more research and found THIS youtube video that taught us to make these plane base for tile able texture.


Then I started all over and made the stylistic rock formations on zbrush. 


and that right there will become the tile able texture I will be creating with a program called xnormals, but I had no time to do that in class, so I will most likely try it out a bit after school at home.


I think that was a pretty good progress today (not really) I still dont even know if these will fit well with the game we are creating, but at least now I know how to get to this step in zbrush pretty quickly.